Showing posts with label toronto. Show all posts

Tuesday, March 24, 2015


I love working with clay for a variety of reasons. It is a naturally beautiful color, it can be molded into just about anything, it adds an earthy touch to the home and quite frankly, it's fun to squish. Working with clay can be a relaxing, solitary activity to calm any stressful thoughts from a long day of work, or it can be a fun activity to do with friends. One basic and extremely calming project is to make a pinch pot.

These pots are not too challenging to cause anybody to get upset, although personally, I could sit for hours trying to perfect the roundness.


How to make a clay pinch pot:

You will need:

~ A big block of air drying clay - You're local craft store probably supplies this. I got an 11 pound (5 kg) block of clay for $17.00, but there are smaller blocks for sale if you don't think you will use the clay often.

~ Wire clay cutter - This is just a piece of flexible, medium thick wire with two handles on either end so you can easily cut off a chunk of clay. You could make your own without too much trouble.

~ Pencil - Or any other sort of pointy object that is not too thick.

~ Small bowl of water - You may need to dip your fingers in this to keep the clay moist. After a while the clay will start to dry a little. This makes it harder to mold and a lot less fun. Nobody likes dried up clay.


Instructions:

1. The first step is to roll a ball about the size of your palm. You can get a pretty spherical shape by roughly rolling the clay in your palms and then tossing the ball from hand to hand until the clay looks nice and even. No need to be a perfectionist!

2. Smooth over any cracks with your fingers. To do this, smooth the clay horizontally over the crack until it is no longer visible.


3. Now the fun begins. With your thumb, make a hole about 3/4 deep into the center of the ball. Some clay might get under your nails, which I think is a little gross, but that's just my clean freak shining through.

4. With your thumb in the center and your other 4 fingers supporting the clay from the outside, evenly pinch all around the pot. Do not pinch too hard. You can repeat this step many times until the walls of the pot begin to thin out and the opening starts to widen.

Be careful not to pinch the top rim of the pot. The rim will start to widen on it's own.

5. By now you should have a cute little pot forming! Go back and smooth any cracks that have formed and try to keep all of the walls as evenly thick as possible.

6. Use your pencil (or other sharp and pointy object) to poke 3 tiny holes in the bottom of the pot. This is to let the excess water drain after watering the plant that goes inside. Pretty doesn't matter because the soil is going to cover any imperfections.


7. Allow your pot to air dry for 2-3 days. Keep it in sunlight to get the process going a little faster.

The clay will change to a lighter color as the pot begins to dry.

As you can see, I decided to get fancy and curve the rim of my pot outwards to create a little more shape. This is totally optional. You can do anything you want with the pot now! The pinch pot is the most basic form.

After I made my first pinch pot, I got a little excited and made a second larger pot and stuck a face on it. He is a weirdo but I am a fan.

I haven't repotted my plants yet but I will as soon as I buy more soil. Until then, enjoy this un potted plant shoved into my newly made clay pot!


Tuesday, February 17, 2015

I'm feeling really inspired lately, probably because spring must be on it's way eventually...although the forecast says snow and more snow. I've been reading blogs that I'm interested in, pinning on Pinterest and writing in my journal nonstop. Even with all of this, I think everybody could use a little extra nudge sometimes. I could use that nudge right now. I figure there's no better way than to share with the internet world that I am going to stay good to my body - eat well, exercise well, sleep well. Then I will feel well. :) Let's count this as a pact.

Story time:

I went downstairs to search for ingredients to make a healthy lunch just 30 minutes or so ago. Being at my parent's house, they don't care quite as much about living a fully healthy lifestyle as I do. I searched the fridge and the pantry and with nothing really healthy and appetizing in sight. Then I laid my eyes on an unopened box of Valentine's Day chocolate. Dun dun dun...

I'll let you imagine what happened after that. So yeah, I really need this extra nudge of motivation.


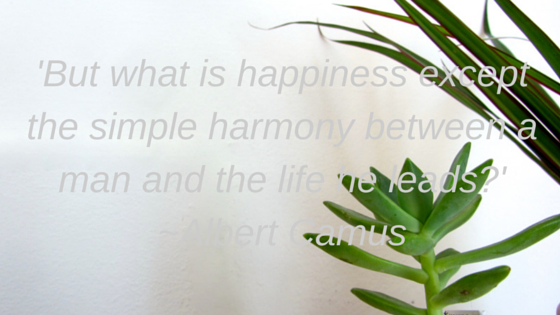
First we have this little quote. Tres inspirational. I'm a top notch procrastinator so let's try to remember this one. Ya got that, Isabelle?


No more giving power to the Valentine's Day chocolates. They didn't even taste that good and Valentine's Day is so three days ago. Let's not forget that one either.


Here's a little warm weather inspiration. I think Candice might be from a different dimension with that bangin' bod but a girl can dream, right?!


'If you don't trust yourself, no one else is going to, either.'


More inspirational pics are coming your way so stay tuned, folks. Enjoy the snow and keep in mind that hibernation is coming to an end!

Sunday, November 16, 2014

Canadian weather doesn't fool around. It's barely 30 degrees here and snow has been falling all day long. The sad part is, I think it may be colder inside my apartment than it is braving the great outdoors! For dinner I knew I needed to make something that would keep me warm. I planned on making a simple but delicious chickpea curry (I know you must be dying to read about that, so recipe coming soon *wink wink*). After a series of unfortunate events and a sad realization that my can opener had broken, I decided that chickpea curry was not an option tonight. I didn't realize this until after I started making the coconut rice. So now I had some rice boiling while I sat on my kitchen counter in a slump. Cue inspiring pictures of food and a lot of disappointment when I realized a good chunk of the recipes required a can opener. No worries, this story has a happy ending. After about 10 minutes of feeling uninspired by food inspiration, an idea was born! A coconut rice bowl with a fried egg and avocado. So easy, ay yai yai!

I'll save you ten minutes of your life by giving you the blatantly obvious recipe below. No uninspiring food searching for you, my friend!


Coconut Rice Bowl

Ingredients:

~ Coconut milk - 1/2 cup

~ Jasmine rice - 1/2 cup

~ Avocado - 1/2

~ Egg - 1

~ Salt

~ Pepper


*no duh* Instructions

1. Begin cooking the jasmine rice with 1/2 cup water and 1/2 cup coconut milk.

2. While the rice is cooking, fry an egg.

3. Cut your avocado.

4. Put the rice, avocado and egg into a bowl. Add salt and pepper as you wish.

Take your first bite...WOW party in your mouth! I bet you weren't expecting such deliciousness to come out of such a simple recipe! Ah, the beauty of laziness. This bowl will keep you satisfied for a long time after you've finished eating as well.

Sunday, July 13, 2014

I really love Toronto in the summer time because I can finally come out of hiding in my apartment and get some good old Vitamin D. If it's not summer time here, it's freezing. I'm talking winter, fall and spring too. All three of those seasons are for hibernating until summer comes around. Now that it's finally warm again, I'm taking full advantage by spending all day everyday in the sun. The sun, as you probably know, makes people very hot. And while some people have the luxury of going back to their air conditioned apartments, I am a broke student living in a studio apartment and air conditioning is not available. That being said, I need to eat cool and refreshing dinners. Since today was an especially hot and humid day, I needed an especially fresh and cool dinner. My food options in my refrigerator are pretty limited right now so I thought about what I had a lot of. Fruit. So that's how I came up with this genius salad! It's an easy one to make. Just chop chop, snip snip and you're good to go.

Spinach salad with mango, strawberry, blueberry, avocado and feta cheese:

Ingredients:

I know you're really curious to find out what's in this salad.

~Spinach - As much or little as you'd like
~Mango - 1/2
~Strawberry - 4 or 5
~Blueberry - Plop on as many as you want
~Avocado - 1/2
~Feta cheese - Crumble to your heart's content
~Maple balsamic dressing

Instructions:

Step 1: Cut up a bunch of spinach leaves and place them in a bowl.

Step 2: Cut a mango and dice 1/2. Save the second half for another time.

Step 3: Slice the strawberries vertically.

Step 4: Cut an avocado and dice 1/2. You guessed it, save the second half for another time.

Step 5: Toss the mango, strawberries and avocado onto the salad. Add blueberries.

Step 6: Crumble as much or as little feta as you'd like.

Step 7: Add the maple balsamic dressing.

Enjoy!


Cinnamon Toast:

This is a silly little side dish but it's delicious and so quick to make.

Ingredients:

~Bread - 1 slice, I use spelt bread
~Butter - just enough to coat one slice of bread
~Cinnamon

Instructions:

Step one: Generously butter one slice of bread. Shake cinnamon on top. I personally think the more the better.

Step 2: Put it in the toaster.

Genius! Enjoy!


I woke up this morning with my sister, Maddie, packing her things to leave Toronto. She was here for 3 days and everybody - and everything - was sad she was going. While she was here we made lots of delicious foods that I really should have taken pictures of for this blog. We also went to the Beyonce and Jay Z On The Run tour (which was one of the most beautiful things I've ever witnessed in my life) and we explored all over the city. We went to the downtown, to china town and to hippie town. We covered it all, basically. I was sad to see her go this morning and so was the sky. It was raining - no, it was pouring tears. Once Maddie was out the door I really didn't feel like doing much. It was early morning and the sky was grey and it was a Sunday. I think I can speak for everybody when I say that Sundays are for being lazy. I wasn't really in the mood to make some extravagant breakfast and to make sure I got every nutrient I needed to fuel my body throughout the day. I decided on making 3 ingredient pancakes. Quick and simple. But wait! These pancakes DO have the ingredients I need to fuel my boy throughout the day! Protein and fruit! All I needed extra was a side of toast!

3 ingredient pancakes:

Ingredients:
~Banana - 1
~Eggs - 2
~Baking powder - 1 tsp

The simple instructions:

Step 1 : Mash a banana to complete mush with a fork.

Step 2: Whisk 2 eggs, add a teaspoon of baking powder.

Step 3: Mix the eggs, banana and baking powder together.

Step 4: Heat on a pan. Poor the mix into circles about the size of your fist. They are ready to flip when bubbles start to form on top, just the same way you would wait to flip a 'normal' pancake.


Enjoy!

Feel free to add anything your heart desires to the pancakes. Blueberries, dark chocolate, milk chocolate chips, butterscotch chips, the list goes on and on.

I made a couple with blueberries and a couple plain. Then as toppings I used a number of different things such as almond butter, cacao butter, macadamia nut butter and maple syrup. My favorite combination is the almond butter and maple syrup. That's really my favorite combination on everything. It never fails.

//

//

Popular Posts

'Holding On To Anger Is Like Drinking Poison And Expecting The Other Person To Die.' ~Buddha

'No one saves us but ourselves. No one can and no one may. We ourselves must walk the path.' ~Buddha