Monday, August 17, 2015

Are you aware that squash is considered a fruit? Does that blow your mind? My mind is blown.

Can you guess what fruit this curry contains? Have I asked enough questions yet?


Sweet Curry
(with squash, sweet potatoes, carrots and mushrooms)
(with a side of kale if your tryna get those greens)

Ingredients:

~ Coconut milk - 2 cups

~ Squash - 1 whole

~ Sweet potato - 2 whole

~ Carrots - 3 whole

~ Mushrooms (I used cremini)- 3/4 cup sliced

~ Turmeric - 1 tbsp

~ Cumin - 1/2 tbsp

~ Cayenne pepper - 1/2 tbsp

~ Ginger - 1 tbsp minced

~ Garlic - 1 1/2 to 2 cloves, minced

~ Cilantro - 1 pinch, chopped (optional)

~ Rice - 1 cup (optional)

~ Kale - 1/2 cup (optional)

Directions:

1. Dice the squash, sweet potatoes and carrots.


2. Bring a giant pot of water to a boil. Enough water to cover all of the food you are about to put in.

3. When the water has begun boiling, first add the squash, then sweet potatoes and then carrots. Do so in a timely manner, as they each take slightly different amounts of time to cook through:


Squash - 15 to 20 minutes

Sweet potato - 10 to 15 minutes

Carrots - 7 to 10 minutes


4. Once boiling is complete, strain water and let sit.


5. In a gigantic pan (you're making a lot of food here), bring coconut milk, ginger and garlic to a boil.


6. Add the turmeric, cumin and cayenne pepper. Let simmer with a lid on for 7-10 minutes, stirring occasionally.


7. Taste the coconut milk and make sure you are satisfied with the spices. Add more if your heart desires. A little extra spice never hurts. *wink*

8. Add the squash, sweet potato and carrots to the pan. Toss in the sliced mushrooms and mix all ingredients together.


*Your curry should look something like this:


9. Let the curry simmer with a lid on for 15-20 minutes, stirring every once in a while.

You just made curry in only 9 steps! Woo! If you want to make the bowl shown above, keep reading.

10. While the curry is simmering, why not make some rice to go with it? I used jasmine rice with a 1 to 1 3/4 ratio.

11. When the rice is almost finished cooking, add kale to allow the steam to soften.

12. Put rice, curry and kale into a bowl. Sprinkle with cilantro. BOOM you're done.

Tuesday, July 14, 2015

It has been a while since I last made a slice. I had been craving one for far too long so I decided it was time that I went ahead and made one. They are so incredibly easy to make - way easier than baking...I just didn't seem to have any time. But now, on July 14th, 2015, I present to you the quadruple C's. Chocolate Caramel Cookie Crumble...Slice. Shall we?


Chocolate Caramel Cookie Crumble Slice

Ingredients:

For the chocolate cookie base:

~ Cacao powder - 5 tbsp

~ Cashews (or almonds, hazelnuts or walnuts) - 1/4 cup

~ Almond flour - 1/4 cup

~ Maple syrup - 3 tbsp

~ Coconut oil - 2 tbsp

For the middle cookie goodness:

~ Unsweetened shredded coconut - 1/4 cup

~ Maple syrup - 2 tbsp

~ Almond flour - 1/2 cup

~ Coconut flour - 1/4 cup

~ Vanilla - 1 tsp

~ Coconut oil - 1 tbsp

For the caramel:

~ Mejool dates - 2 cups

~ Coconut milk - 3 tbsp

~ Almond butter - 1 tbsp

~ Coconut oil - 1/3 cup (add extra by the tbsp if you want it creamier)

For the chocolate coating on top:

~ Click here for my super easy chocolate recipe (vegan)


Instructions:

1. First let's make the chocolate cookie base. This is delicious. Put all of the ingredients in your food processor and blend until well combined. The texture will be pretty crumbly but it should be able to stick together. Add more coconut oil by the tbsp if necessary.

2. Put the chocolate cookie crumble in a container (mine was 8x4in) and smoosh it all evenly to the bottom. Place in the freezer. The chocolate cookie base is complete.

3. Now put all of the ingredients for the middle cookie goodness into your food processor and blend until well combined. The texture should be a tid crumbly but less than the chocolate cookie base was.

4. Take your container out of the freezer and add the middle cookie goodness on top. Smoosh it evenly as the second layer and place the container back into the freezer. Middle cookie goodness DONE.

5. Next comes the caramel. Blend all of the ingredients in your food processor until well combined. To get a proper caramel consistency, blend until it all becomes thick and runny. This may take a little more than a minute - all depends on your blender.

6. Take the container out of the freezer. Scoop (or pour) the caramel into the container evenly. Put the container back into the freezer. BOOM. Caramel layer complete.

7. Put all of the ingredients for the chocolate coating into a small mixing bowl. Mix.

8. Take your container out of the freezer. Evenly pour the chocolate on top. Place the container back into the freezer.

9. You just made a Chocolate Caramel Cookie Crumble Slice and after 60 minutes of letting that deliciousness firm up in the freezer, you can slice and enjoy. Good job.

Sunday, July 5, 2015

You better believe me when I tell you that this pie is delicious. Otherwise you'll just have to make it and see for yourself. Don't be thrown off by the list of ingredients. They're all healthy and wholesome - one ingredient just happens to be tofu. Hehe.

You will not taste the tofu. Only goodness.

Make, eat, enjoy.


Healthy Coconut Cream Pie

Ingredients:

~ Tofu - 1 cup

~ Coconut shreds - 1 cup plus 3/4 cup

~ Maple syrup - 1/4 cup

~ Vanilla - 1 1/2 tbsp

~ Coconut oil - 2 tbsp plus 1 tbsp

~ Nuts (Walnuts, almonds, cashews or a combination) - 3/4 cup

~ Dates - 1/2 cup

~ Cinnamon - 1 pinch (optional)

Instructions:

1. First thing's first. Preheat the oven to 350F.

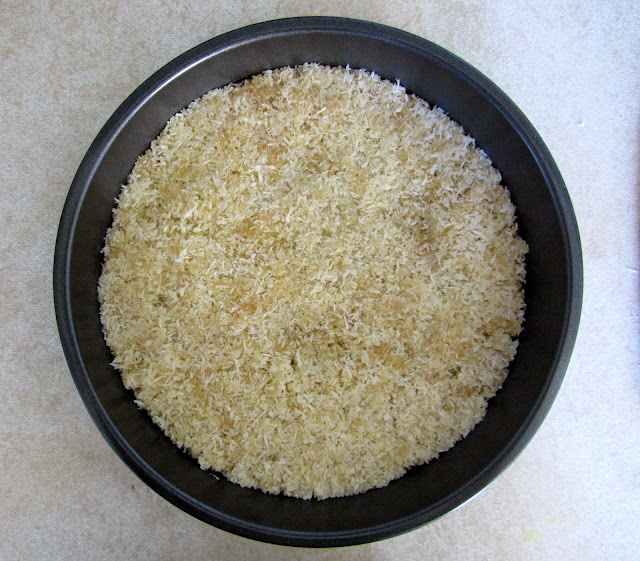
2. Now you are going to make the pie crust. The pie crust is made from the nuts, 1 tbsp of the coconut oil, the optional cinnamon and 3/4 cup of the coconut shreds. Put these 3 (or if you're using cinnamon, 4) ingredients into your food processor and blend until well combined.

3. Spread the crust evenly into the bottom of the pie tin. The crust should come up the sides a tid bit, like any normal pie crust would.

4. Place the crust in the freezer for 30 minutes to let harden.

5. While you are waiting on the crust, make the pie filling. Take the tofu, 1 cup of coconut shreds, maple syrup, vanilla and 2 tbsp of coconut oil and place all of these ingredients into the food processor.

6. Blend until well combined. The mixture should be very creamy.

7. Pour the mixture evenly into the pie crust and place all of this into the oven for 30 minutes.

8. Take the pie out of the oven, sprinkle a little coconut on top and place the pie back into the oven for another 7-10 minutes.

9. Place the pie in the refrigerator for at least 45 minutes before eating. The center of the pie needs time to set and the crust needs time to harden again.

10. You have just made coconut cream pie in 10 easy steps! Woo!

Wednesday, June 3, 2015

It's a little overdue that I share some little inspirations.

As we are making choices day to day, the future is constantly changing. There will always be events that we cannot control. We can, however, control how we react to these events, where they will lead us and what we will do next. The trick is to keep ourselves inspired and have a goal that we are working toward - you may have a plan A, B and C, but it is better to come prepared than to not have anything prepared at all, only to be swept up by the stresses of the unknown.


Friday, May 29, 2015

If you have never tried vegan cheesecake before, don't stick your nose up until you have taken at least one bite.


It tastes the same, looks the same and it is potentially prettier than cheesecake made with actual cheese...plus the ingredients are all wholesome and healthy. So basically what I am saying is vegan cheesecake is better. Better for you, better for the animals. *Happy cheers*

So how do you know I'm not just talking up a recipe that I am about to give you? Well, cheesecake has been one of my favorite (if not my no.1 favorite) foods since the first time I tried it, back before my age even hit the double digits. I have high cheesecake standards.


I had not tried vegan cheesecake until earlier this year when my friend introduced it to me and I've been a fan ever since.

So here is a small list of reasons you should make raw vegan cheesecake:

1. Tasty

2. Pretty

3. Healthy

4. You only need a small slice to feel satisfied

5. Have it for breakfast, lunch, dinner or dessert - you won't feel guilty! Sure, I think we can all admit to eating a slice of cake with all of the processed sugars for breakfast...but now you can eat a slice of cake without all of the processed sugars and feel full enough to not need a second slice (although you might want one because it tastes so good).


Q: So what's in this cake?

A: Well, there is a full list of ingredients below but it is basically just dates, nuts and cashews, a little coconut milk and some lemon juice.

Now before we get started, keep in mind that this is the most basic cheesecake recipe. Once you know the basics then you can go on to making prettier, more exciting and/or more flavorful versions. Raspberry cheesecake? Blueberry cheesecake? Strawberry cheesecake with chocolate drizzle? The possibilities are endless!

Simple Easy Raw Cheesecake

Ingredients:

~ Cashews - 2 cups, soaked overnight

~ Coconut milk - 3/4 cup

~ Dates - 1 cup

~ Nuts - 1 cup (best to stick with almonds or walnuts)

~ Shredded coconut - 1 cup

~ Maple syrup - 1/3 cup

~ Juice of a lemon - 1/2

~ Coconut oil - 1/4 cup

~ Vanilla extract - 1 tbsp

~ Cake tin - Preferably a cheesecake tin but any tin around 23cm x 3.5cm will do, like the one I used to make the raw carrot cake.


Instructions:

1. Soak the cashews if you haven't done so already. Do this by putting the cashews in a bowl and filling it with water the night before you plan on making the cheesecake. I always find soaking to be a pain when I want something immediately, but patience is key. :)

2. First we will make the crust. In your food processor, blend the dates, nuts and shredded coconut until it has reached a doughy consistency. You should be able to roll it in a ball if you wanted to...not that you are going to do that.

3. Spread the crust into the bottom of your cake tin until it's about 1/8 of and inch thick. Place in the freezer for 10-15 minutes to harden the crust a tid before adding the cheesecake.

4. While the crust is hardening, blend cashews, coconut milk, maple syrup, lemon juice, coconut oil and vanilla extract in your food processor. Blend until it has reached and smooth and creamy consistency. This is going to be the cheese part of the cake.

5. Evenly spread the 'cheese' on top of the crust.

6. Place in the freezer for at least 6 hours before enjoying. (More waiting...UGH.)


So you want to get more creative than just a simple cheesecake? Keep reading!

~ Try adding berries in with the cheese ingredients. Still blend until smooth and creamy. A pretty color should have been created.

~ You can also get creative with different layers of colors. Add different berries to achieve different colors. Between each layer, refreeze the cake for 10-15 minutes to assure the colors don't run into one another.


Q: How did I get mine to look and taste the way it does?

A: I spread 1/3 of the 'cheese' evenly over the crust. I plopped some raspberries on top. I froze the cake for 10-15 minutes. I blended some raspberries into the remaining 2/3 of the 'cheese' until I reached a smooth and creamy consistency with a pretty color and then spread that over the plain cheesecake. I froze the cake for 6 hours. Then I had a blast eating a nice slice.


Wednesday, May 20, 2015

I try to stay away from wheat because I don't always like the effects it has on the body. That being said, I really miss bread; Light, fluffy, delicious.

I also stay away from refined sugars because they are just plain bad for the body.

Now I can have bread AND chocolate...introducing Chocolate Chip Bread! Wheat free, refined sugar free and best of all, vegan! How is this possible??? Read on, my friends.

When I told my sister that I had made this, she was a little skeptical. It sounds too good to be true. There are so many ingredients that would need to be replaced in order to make bread GF/V and refined sugar free. I understand where her concerns were coming from. The beauty of this recipe is that there are not a bunch of weird ingredient substitutions - the recipe is nothing but wholesome ingredients mixed together to create a warm loaf of happiness.

Think fluffy but dense, moist (sorry to use that word) and sweet.


Chocolate Chip Bread

Ingredients:

~ Flax egg - 1 (1 tbsp chia seeds, 3 tbsp water)

~ Almond milk - 1 cup

~ Applesauce - 1/3 cup

~ Apple cider vinegar - 1/2 tbsp

~ Vanilla extract - 1 tbsp

~ Coconut sugar - 1/2 cup

~ Spelt flour - 2 cups

~ Vegan chocolate chips - 3/4 cup (recipe here)

~ Banana - 1 1/2 sliced (optional)

~ Baking powder - 3 tsp

~ Salt - 1 pinch

~ Cinnamon - 1/2 tsp

~ Nutmeg - 1/4 tsp

Lots of ingredients, yes. But never fear, this is still extremely easy to make! Let's get started.

Directions:

1. Preheat your oven to 350 degrees (F).

2. Make your flax egg. Set aside.

3. Mix the almond milk and apple cider vinegar in a separate bowl. Set aside.


4. Make the vegan chocolate chips. Set aside.

4. After the milk has set for about 5 minutes and the flax egg has gotten all gooey and egg-ish, combine these into a medium bowl. Add the applesauce, vanilla extract and coconut sugar. Whisk until well combined.


5. In a separate medium sized bowl, combine the spelt flour, vegan chocolate chips, baking powder, salt, cinnamon and nutmeg. Mix until well combined.


6. Now mix the bowl of liquid ingredients with the bowl of dry ingredients (you guessed it) until well combined.


7. (This step is optional) Slice the banana and mix in with the other ingredients.

8. Poor the mixture into a bread tin (or any other sort of tin that you feel would work. The batter tin should be at least 4 inches deep. The container that I used was 6x6in.).


9. Your oven should be preheated by now so place your soon-to-be bread in for about 45 minutes. Depending on the depth of your container and how strong your oven is, the time will vary. Start checking if your bread is done about 37 minutes after putting it in the oven. The bread is ready when it smells heavenly and a fork can be poked into the loaf and come out clean.

10. Let cool before serving. The bread is delicious warm but nobody wants a burnt mouth!


See? You just made some really tasty, icky-ingredient-free bread in just 10 steps! Congratulations!


*I found the original recipe for this bread here but I changed some things in the recipe above to make it appeal to my taste buds even more!

Thursday, May 7, 2015

I love slices but I am not a fan of making them due to the clean up. Not that the clean up is that bad, but since my tiny apartment doesn't have a dishwasher and I have to clean my food processor by hand, I tend to steer clear of recipes that require them.

So why am I giving you the recipe for a slice if I don't even like to make them? This one doesn't require a food processor! *round of applause* *joyful dancing*


Rest assured, this recipe is extremely simple (as all the recipes that I post tend to be) so you can make this hassle free.

Why should you make this slice other than the fact that it doesn't require a food processor? Well, it's the perfect combination of savory and sweet. The coconut compliments the chocolate, the chocolate compliments the almonds, the almonds compliment everything. It's the perfect combination.

So let's get right to it, shall we?

Coconut Almond Slice

Ingredients:

~ Shredded coconut - 2 cups

~ Coconut oil - 4 tbsp (for the coconut), 1/2 cup (for the chocolate)

~ Coconut sugar - 1/2 cup

~ Vanilla - 2 tbsp (for the coconut), 1 tbsp (for the chocolate)

~ Maple syrup - 1/4 cup

~ Cacao powder - 1 cup

~ Almonds (pre sliced or slice your own) - 1 handful

~ Salt - 2 pinches (for the coconut), 1 pinch (for the chocolate)

Instructions:

1. First you are going to make the chocolate. Click here for the really easy recipe. It will take you about 90 seconds to make it. Once it's been all mixed together, lay almost all of it out (save a little extra for drizzling on top of the slice) in a flat pan. This is going to be the base of the slice.

If you thought you were thinking ahead by putting the first layer in the freezer, do no such thing! That time will come but it's not yet.


2. Next you are going to make the coconut layer. I found this layer really enjoyable to make for some reason. Probably because it doesn't require a food processor. *more joyful dancing*. Mix the shredded coconut, coconut oil, vanilla, maple syrup and salt in a large bowl.


3. This is the step that you will put the first layer (the chocolate) in the freezer. Freeze for about 2 minutes, or until the chocolate is firm but not completely hardened.

4. Take the first layer out of the freezer and evenly spread the coconut on top.


5. Put the sliced almonds on top of the coconut layer and gently press them into the coconut. This is just so they will not fall off as easily when the slice is being cut.


6. Drizzle the remaining chocolate on top of the almonds.

7. Place the slice in the freezer for 30 minutes or more.

8. Slice into bars and enjoy!


Mmmm.

Monday, May 4, 2015

Not too long ago, I was gifted with a magical new kitchen appliance - a spiralizer.

When I first opened the box, I was a little intimidated. These fancy plastic contraptions don't exactly scream 'Use me!' so I decided I should actually read the instructions instead of attempting and failing to make it work.

These things are amazing. All you have to do is shove a vegetable of your choice onto the veggie holder, rotate the handle and watch as the spiralizer transforms your food into perfectly curled noodles! This entire process fascinated me. If only I had more vegetables to spiralize.

My veggie of choice was a zucchini. I am a big fan of zucchini noodles and after buying them various places and falling in love over and over again, it only made sense to make them on my own.

The noodles were a success.


How awesome is that?! I couldn't help but take hundreds (Ok, maybe more like 20 but that's still a pretty big number. It's in the double digits.) of photos of the spirals being made. I won't make you look at all of them but I cannot stress enough how cool it was to watch this process happen. It was magic right before my eyes.


My final product was a fabulous bowl of noodles. I'll take you step by step through the zucchini-noodle-making process.

Zucchini Noodles

Ingredients:

~ Zucchini - 2

~ Water - Enough to cover the noodles in a medium sized pot

~ Salt - 1 pinch


Instructions:

1. Spiralize both zucchinis and prepare to be amazed.

2. Place spiraled zucchini in a medium sized pot of boiling water.

3. Add salt and boil for 2-3 minutes. Be careful not to boil for too long or the noodles will become unappetizingly mushy and they might even start to fall apart.

4. Strain water and top with whatever you want. I topped mine with a delicious avocado sauce. Get the recipe here!

Enjoy your fabulously healthy and equally delicious meal!

Thursday, April 30, 2015

You like avocados? I like you. You like avocado sauce? I like you even more.


Today I whipped up a quick avocado sauce to put on some zucchini noodles (that I also whipped up quite quickly, so expect a recipe coming soon. *wink*). The process was so fast, it was over before I even realized it began. IT WAS THAT FAST.

Since the last recipe I posted, the Next Level Tacos With Nopales Cactus Paddle, took a whopping 11 steps before it was completed and ready to eat (I believe that holds the record of the most amount of steps I have ever written in a single blog post), here's a particularly easy recipe that can be made in a whopping 2 steps. It's all about balance, eh?

This recipe makes enough for one person - because there is only one person I need to worry about feeding in my life right now (me). If you want to make enough for 2 people, I would suggest doubling it. Or if you really like the recipe you might as well triple it because avocados really are just. that. good.


Avocado Sauce

Ingredients:

~ Avocado - 1

~ Garlic - 1 clove

~ Cilantro - 1 small bundle, about 1/4 cup before it's chopped

~ Lime juice - 3 to 4 tbsp

~ Salt - 2 pinches

~ Pepper - 2 pinches

~ Cumin - 1/2 tbsp

Instructions:

1. Chop the garlic and the cilantro into small pieces. Mincing isn't completely necessary.

2. Place all of the ingredients in the food processor and blend until smooth.

Voila!

Wednesday, April 29, 2015

Let's make a next level taco today, OK?


But before we begin, it's story time.

When I am thinking about what to use for my WTF posts, I like to wander around the grocery until something catches my eye. This week, that something was a cactus paddle. A Nopales cactus paddle, to be exact.


Apparently enough people eat these in order for the grocery to sell them. This, to me, is shocking. So of course I had to buy some.

The Nopales cactus paddle.

First impression:

~ 'No way are they selling cactus paddles in the grocery.' *Jaw drop*

~ 'I decorate my apartment with these!' *Jaw still dropped*

~ 'People eat these???'

First impression tasting it:

~ There was a strange sticky substance inside, similar to aloe. This is cactus juice.

~ They taste a bit like string beans...a less flavorful version.

Side note: The Nopales cactus isn't the most exciting for the taste buds, but how cool is it that you can eat a cactus?! Don't knock it 'til you try it.

Nutrition facts:

~ Rich with Vitamin C - One serving of this cactus paddle can give you up to 28% your needed daily intake of Vitamin C!

~ Anti-inflammatory - This cactus is traditionally used as an anti-inflammatory agent and has been useful in helping to reduce inflammation in the stomach.

~ High in antioxidants - Antioxidants help protect cells in the body from things like pollution, radiation, smoking and certain chemicals. They can also help to lower your risk of getting infections and they help to protect against cancer.

So do you want to make a next level taco now?! Yeah, I thought so. ;)

Next Level Tacos With Nopales Cactus Paddle

Ingredients:

~ Nopales cactus paddle - 1

~ Tortilla (I used a GF brown rice tortilla) - 1

~ Avocado - 1/2

~ Tomato - 1/4 cup diced

~ Onion - 1/4 cup chopped

~ Cilantro - 2 pinches (or as you wish)

~ Lime - 1/2

~ Cracked pepper - 1 pinch

~ Oregano - 1 pinch

~ Salt - 1 pinch plus 2 pinches

Instructions:

1. First you will need to prepare the cactus paddle. By prepare, I mean you are going to slice off the spines so you don't have a painful experience when all you are trying to do is innocently eat a taco. To prepare, use a serrated knife and make sure you cut all of the spines off. This could take some time so be prepared to zen out and maybe turn on some tunes.


2. Next, cut off the base of the paddle.


3. Rinse the paddle under running water and ensure that all of the spines are removed. Some of the cut off spines may still stick to the paddle. Keep this in mind while rinsing.

4. Slice the paddle into thin strips.


5. Using just enough water to cover the strips, bring water to a boil and add 2 pinches of salt. Place strips in the water and boil for 10-15 minutes uncovered.


6. While the paddle is boiling, chop up the avocado, tomato, onion and cilantro.

7. Make a simple guacamole by mashing the avocado, onion and lime. This takes less than a minute and I personally believe that mashed avocado is 1000x better than plain old chopped avocado.

8. Place the tomato on the tortilla, followed by the cactus paddle (after it has finished boiling and you have strained the water, of course), then the guacamole and lastly the cilantro.

9. Squeeze the 1/2 lime all over the mountain of goodness that you will now call a taco.

10. Sprinkle pepper, 1 pinch of salt and oregano.

11. Wrap the tortilla around this giant mountain of food and take a big bite. You have now made a tried and true next level taco. Bravo.


//

//

Popular Posts

'Holding On To Anger Is Like Drinking Poison And Expecting The Other Person To Die.' ~Buddha

'No one saves us but ourselves. No one can and no one may. We ourselves must walk the path.' ~Buddha